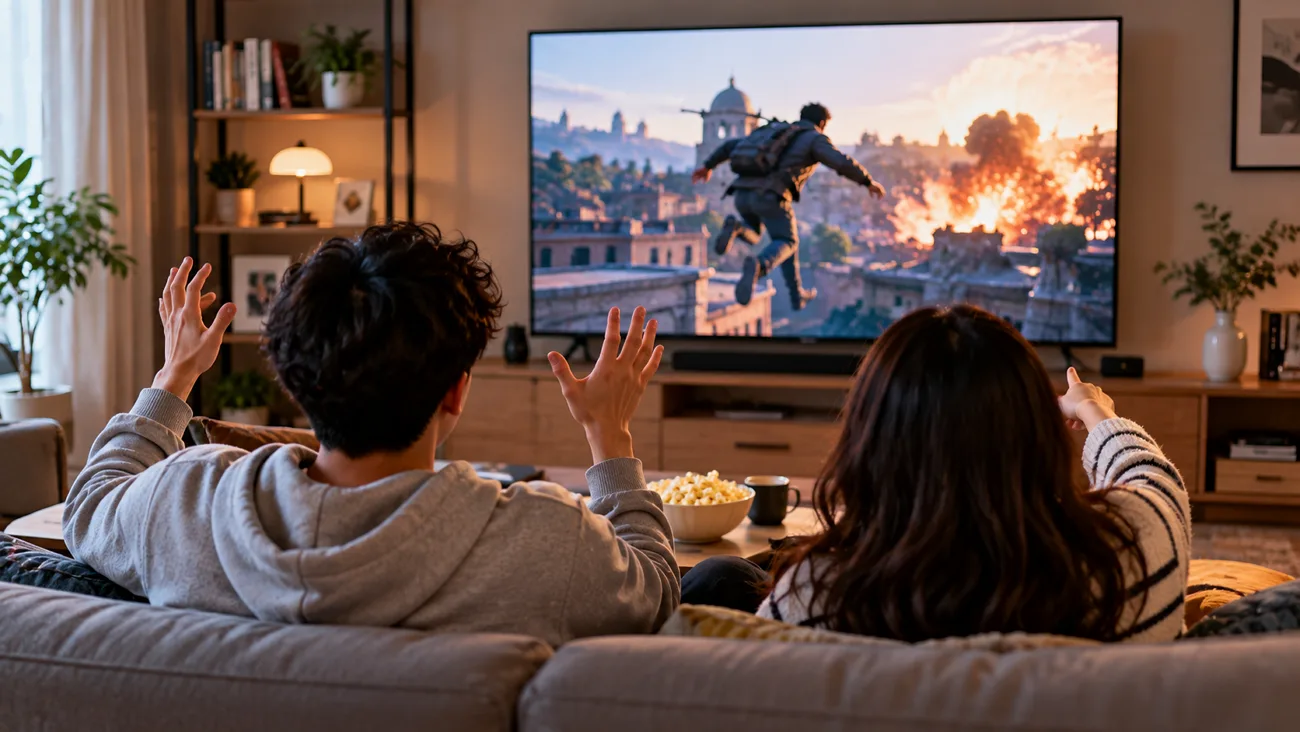
Reaction videos can work just as well without your face appearing anywhere on screen. A cartoon host can watch the selected clips and share comments at the right moments. Your commentary script provides the starting point for learning how to make a reaction video.
Each scene should have a reaction that feels connected to what viewers are watching. MagicLight AI uses your script to create an animated host that delivers the commentary. The finished host video can then be placed alongside the original clips during editing.
Part 1. How to Make a Reaction Video
The question “How do people make reaction videos” starts with choosing interesting content. Every reaction video needs a source clip that gives viewers something worth talking about. Your commentary should explain what happens in the clip through an animated host onscreen.
MagicLight AI makes this possible without requiring you to record yourself in front of a camera. The Story to Video in this platform supports video scripts of up to 12000 characters for creating longer reaction content. Your written script becomes an animated video with character expressions that match the commentary.
Key Features
- MagicLight Agent: MagicLight Agent turns your commentary script into a detailed scene plan. Each scene includes character details that help guide the final video creation.
- AI Story Models: Choose from 14 story models to reshape the reaction script to perfection. Available models include GPT-6 Astra, GPT 5.6, Claude Opus 4.6 for diversification.
- Visual Styles: Over 52 visual styles let you change your animated host's appearance. A 3D Cartoon style gives funny reactions a more playful visual look.
- Long Video Generator: MagicLight AI supports reaction videos lasting up to 50 minutes in length. Longer videos give your animated host enough time to discuss extended clips.
- Voices and Lip Sync: The voice library includes 37 options with support for 11 different languages. AI Lip Sync matches the character's mouth movements with the spoken commentary.
What to Consider When Creating Reaction Videos
Before learning how to create reaction videos, focus on the content your audience enjoys watching. The selected clips should offer enough interesting moments for your host to discuss. Keep the following points in mind when planning your reaction video.
- Reaction Quality: Viewers enjoy reactions that bring a different perspective to the original video. Personal observations can make the discussion more engaging and give each scene greater meaning.
- Video Usage Rights: Footage from other creators requires permission before appearing in your reaction video. Copyright restrictions can apply to short clips even when your video includes commentary.
- Clip Selection: Pick clips that have interesting moments worth discussing with your animated reaction host. The selected content should give your character enough material for meaningful reactions.
- AI Disclosure: Check the platform requirements before publishing videos that feature realistic characters. Cartoon hosts may have different disclosure requirements depending on the platform you choose.
Guide for Making Reaction Videos with MagicLight.AI
MagicLight AI provides a simple process for turning your written commentary into an animated video. Follow the steps below to learn how to create a reaction video using MagicLight AI:
Step 1. Add Your Reaction Video Idea and Pick a Runtime
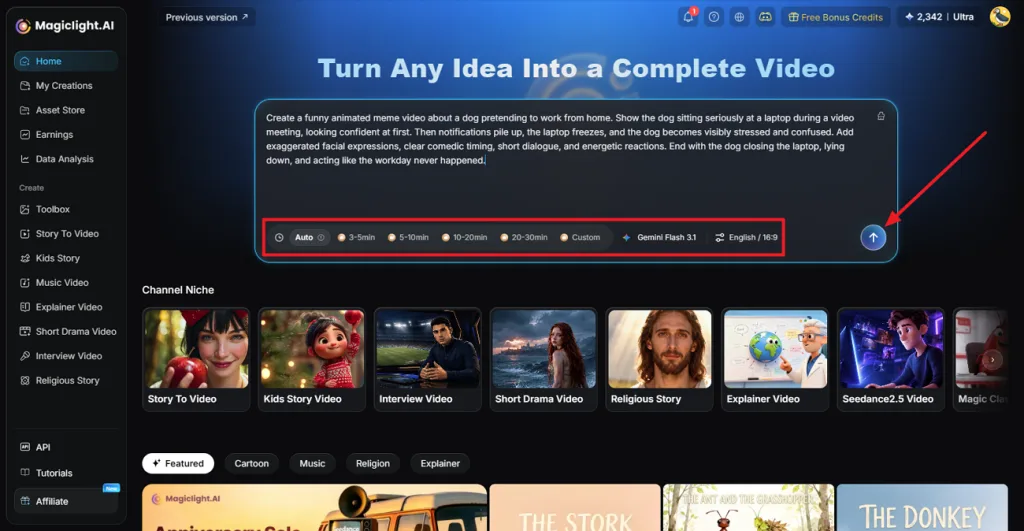
Once you enter MagicLight AI, paste or type your reaction video idea in the prompt box. Choose a Story Model and pick a duration of your choice. After that, select a Language and Aspect Ratio, and press Send for initiating the generation.
Step 2. Review Commentary Script for the Video
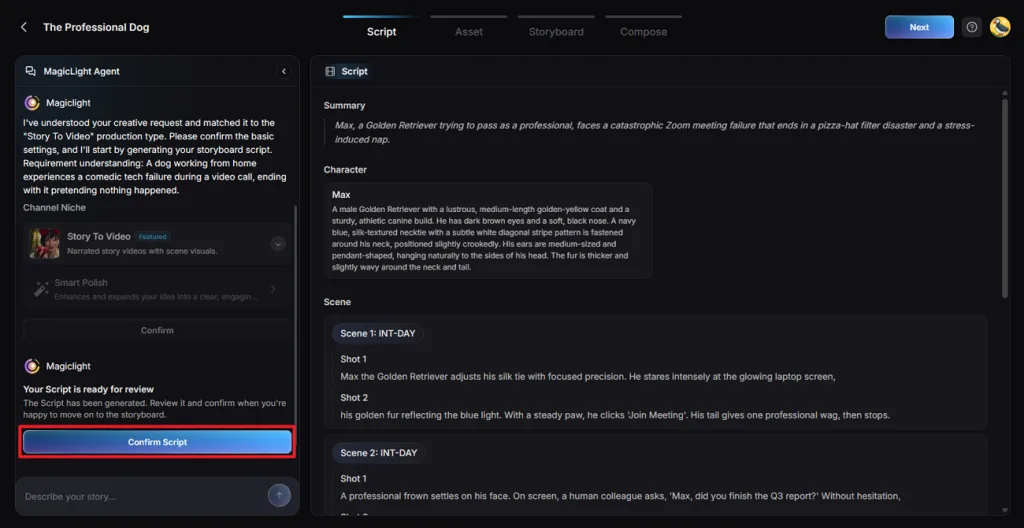
Then, MagicLight Agent prepares a summary of the commentary script and shots. Review the summary and use the Agent chat to make adjustments to the script. Once that is done, press the Confirm Script button.
Step 3. Style Your Reaction Video
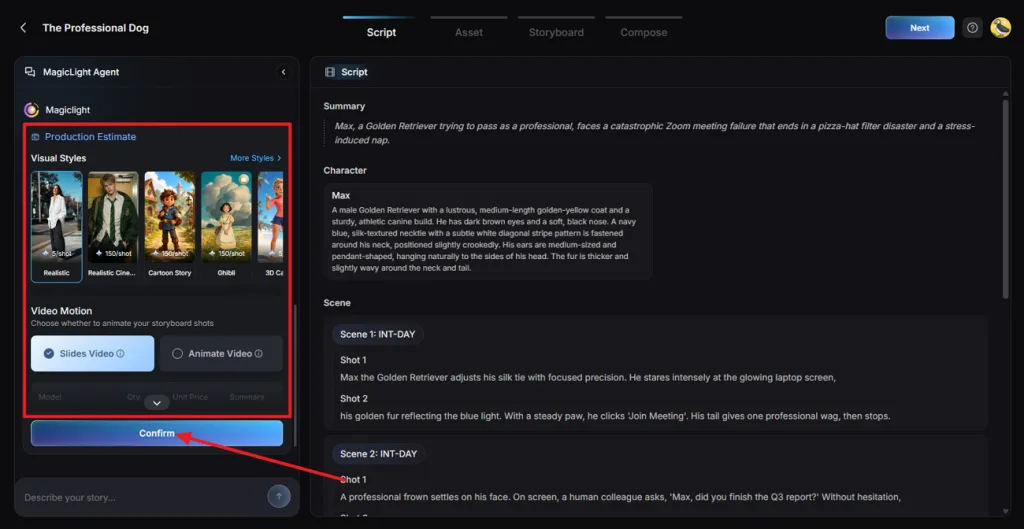
After that, choose a Visual Style from the given options and pick a Video Motion option. Use the Animate Video model for the reaction video since the video will have animated motion. Next, press Confirm.
Step 4. Pick a Character for Your Video
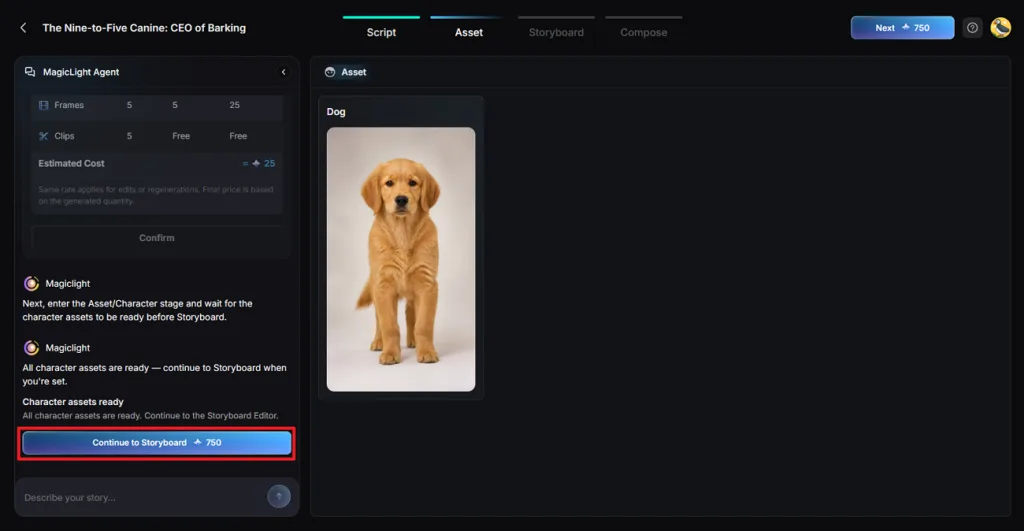
Choose a character for your reaction video that MagicLight AI suggests to you. To explore more characters, simply press the character and find more options in Character Library. Click Go to Storyboard to move forward.
Step 5. Review the Storyboard
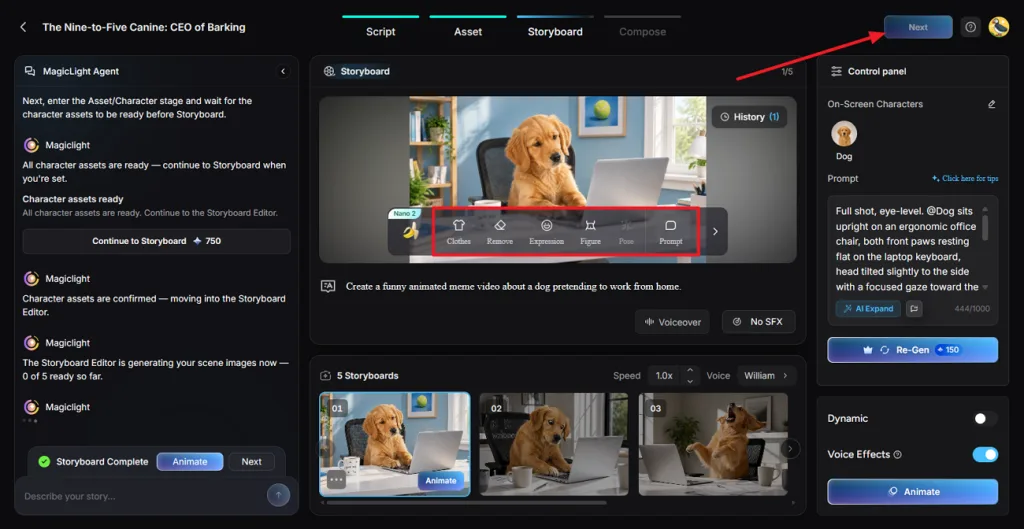
After the storyboard is created in Nano Storyboard, review all scenes and adjust the characters' Pose, Expressions, and Clothes if needed. Once done, press the Next option.
Step 6. Customize the Subtitles and Background Music
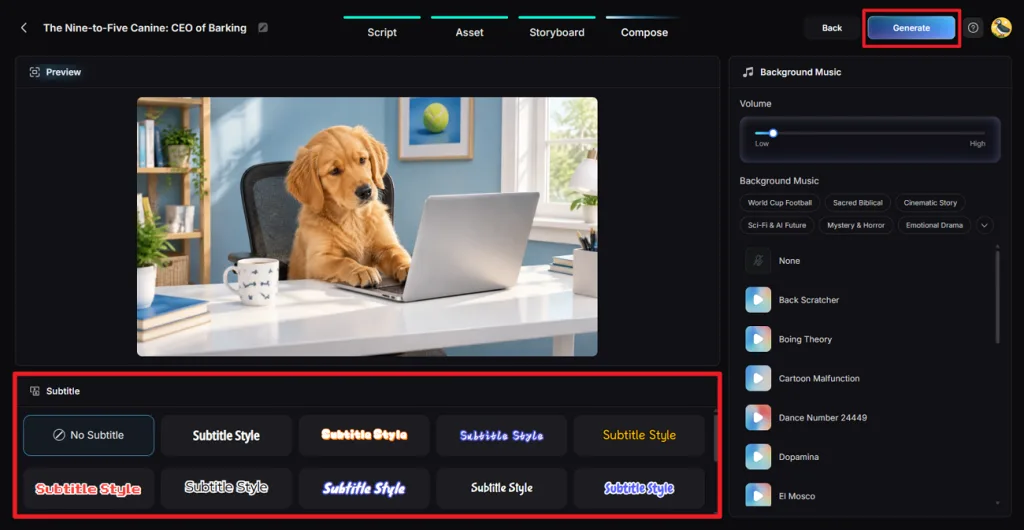
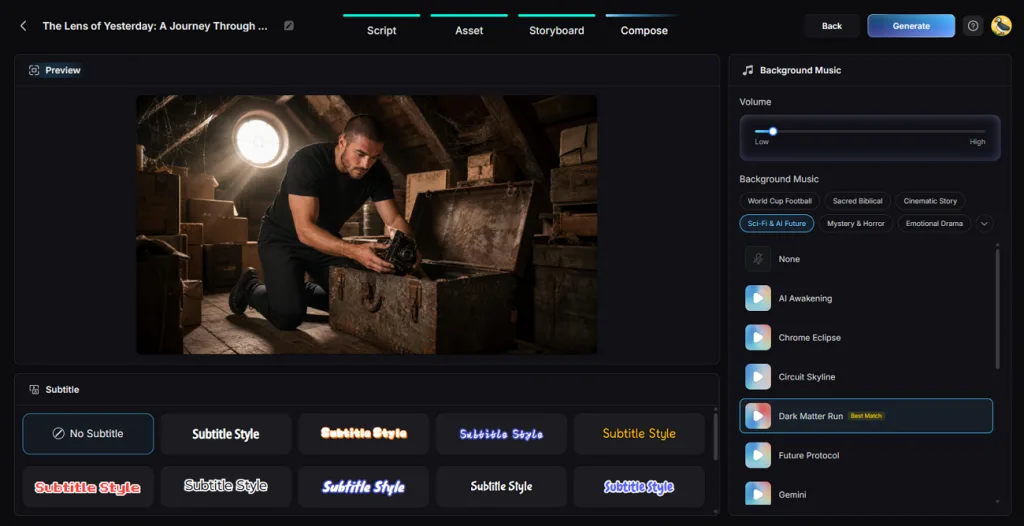
For the captions, choose a Subtitle Style for the reaction video. Access the Background Music section and choose an option and adjust its volume. Next, press Generate to begin the video creation process.
Step 7. Download the Final Video
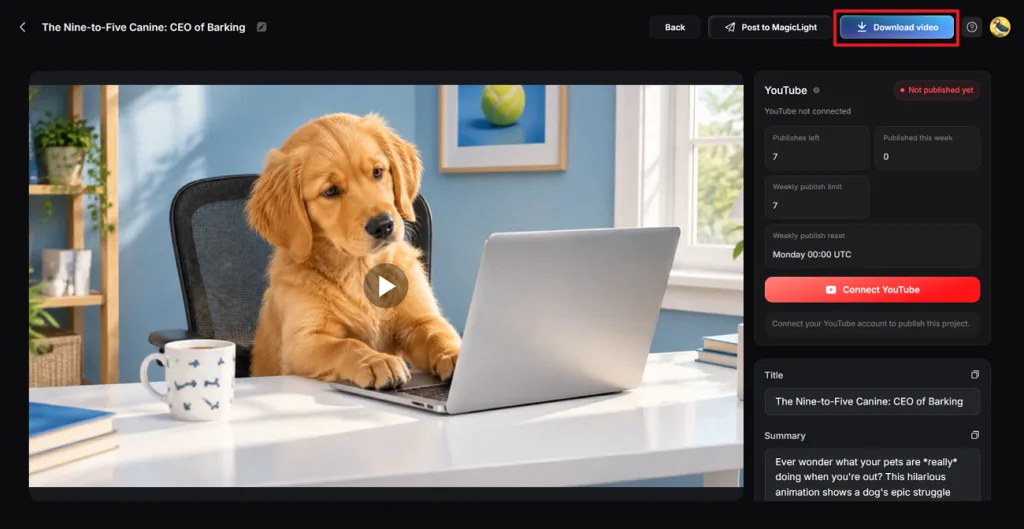
Once the video is generated, play the video and review all aspects like lip sync and scene switching. Then, press Download video to save the output.
Part 2. Why Use MagicLight AI for Reaction Video Creation
MagicLight AI simplifies learning how to do a reaction video through its animated characters and voices. Below are the main benefits of using MagicLight AI for creating faceless reaction videos:
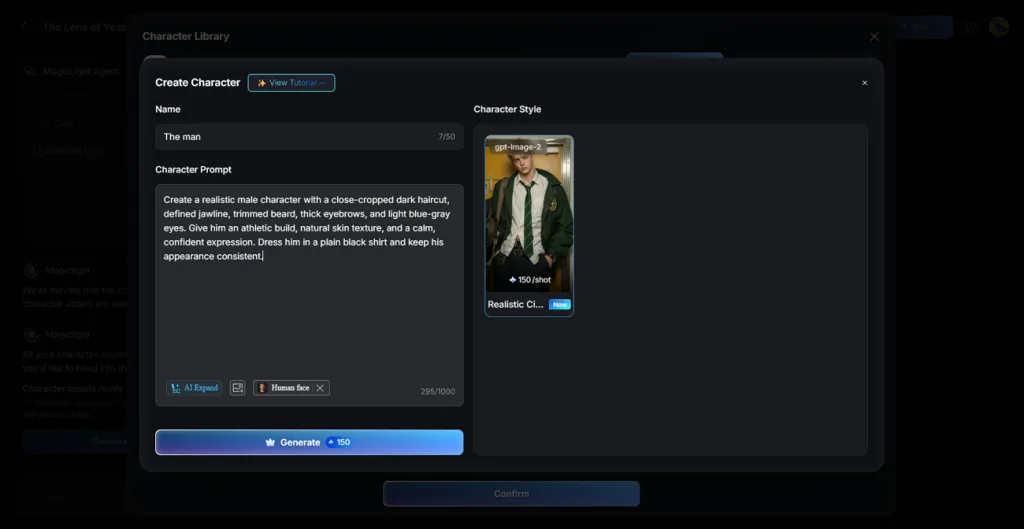
- A Host Who Returns Every Episode: MagicLight AI lets you create a character using a description of up to 1000 characters. Once created, the host can appear in future episodes with the same design. Simply use the @ tag with the character name in storyboard prompts to bring it into another scene.
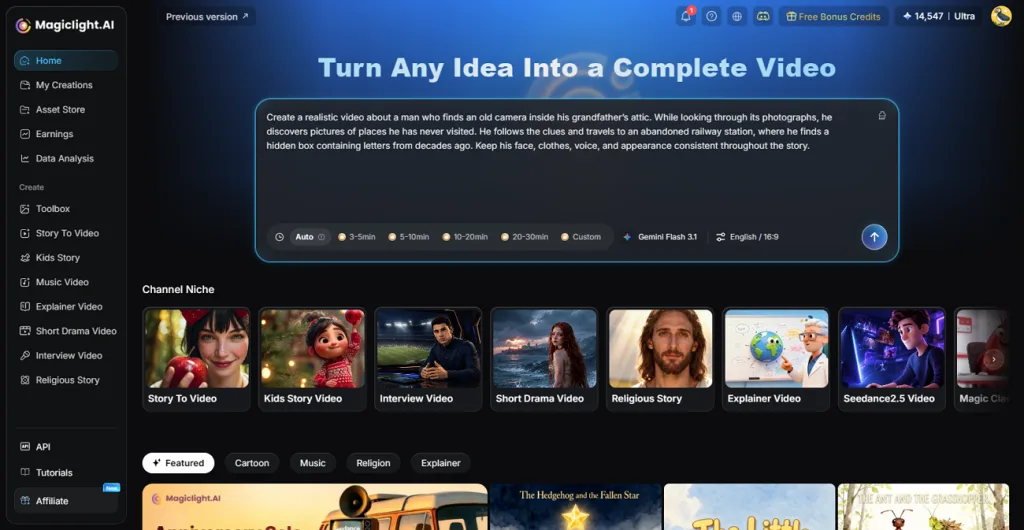
- Episodes That Start as Text: Each reaction video begins with a written idea or script. MagicLight AI handles the scene creation without requiring a camera setup or multiple takes. The Production Estimate card also shows the cost of each shot before you confirm.
- Music and Captions Built In: MagicLight AI offers a library of 40 background music tracks for your videos. You can also choose from 16 subtitle styles to make the commentary easier to follow. These options help viewers enjoy the reactions even when watching without sound.
Conclusion
Learning how to make a reaction video starts with choosing an engaging concept and finding a creative way to present it. Instead of recording yourself on camera, you can use animated characters to express emotions and respond to different moments. With MagicLight AI, you can turn your ideas into reaction videos using AI-generated scripts, animated scenes, and voiceovers, making the creative process more accessible.
Frequently Asked Questions on How to Make a Reaction Video
1. How do I make a reaction video without showing my face?
Instead of filming yourself, you can let an animated character handle the onscreen reactions. MagicLight AI develops that character from your description and builds scenes around its personality. Once the script is ready, your chosen voice brings the character into each scene.
2. What should I include in a reaction video to keep viewers engaged?
An interesting opening gives people a reason to see what your character does next. Reactions feel more entertaining when the expressions reflect something unexpected happening within the scene. Adding a little humor between moments can keep the commentary from feeling too predictable.
3. Can I use AI characters and voiceovers in reaction videos?
AI characters can express your reactions through animation without requiring any personal camera footage. MagicLight AI offers different voices that help match the personality of your chosen character. Facial expressions can also change between scenes to make individual reactions feel more convincing.
4. How can I make reaction videos while respecting copyright rules?
Creating original scenes gives you more freedom to decide what appears in your video. When using someone else's footage, permission may still be necessary despite adding your commentary. Checking usage rights beforehand helps you avoid problems after publishing the finished reaction video.
5. What AI tool can help me turn commentary scripts into reaction videos?
MagicLight AI offers a practical way to learn how to create a reaction video. Its Agent takes your initial idea and develops scenes that follow the planned commentary. Character animation, voiceovers, and subtitles then bring those scenes together within the same project.