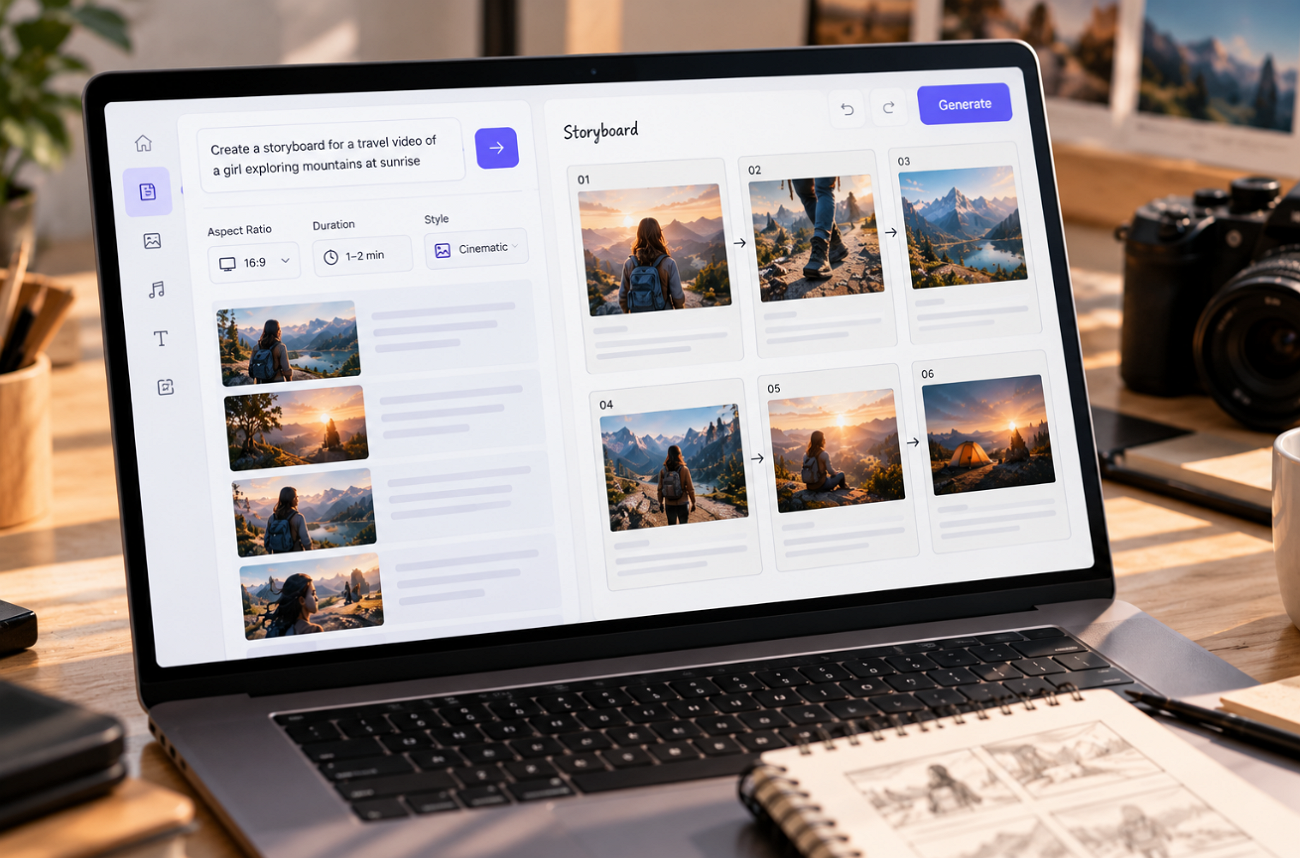
A storyboard maps a video into individual frames, showing each shot before filming or animation begins. Learning how to make a storyboard helps identify pacing issues early and makes visual ideas easier to share with a team or client.
Pencil sketches and free templates remain useful for simple projects. For larger productions, MagicLight AI and similar tools can turn scripts into storyboard scenes, maintain recurring characters, and move approved visuals directly toward animation.
Part 1. How to Make a Storyboard in Simple Steps
The basic storyboarding process works whether you use paper, a template, or drawing software. If you are wondering how to create a storyboard, the 6 steps below show how to turn a finished script or outline into a clear visual sequence:
- Identify the Key Story Moments: Read the script or outline and mark the moments that need visual representation in the storyboard.
- Divide Each Scene Into Shots: Break scenes into separate shots, then label each one as wide, medium, or close-up.
- Create the Storyboard Panels: Set up empty frames that match the intended format, such as landscape for YouTube or vertical for Shorts.
- Sketch the Action and Composition: Show character positions, important objects, actions, and camera placement without worrying about detailed artwork.
- Add Dialogue and Movement Notes: Include shot numbers, dialogue, sounds, timing, and arrows showing camera or character movement beneath each panel.
- Check Pacing and Continuity: Review every panel in sequence to spot missing actions, awkward transitions, or continuity problems before production begins.
Key Features of MagicLight AI
Drawing every storyboard panel manually can slow the process, especially for beginners without illustration experience. MagicLight AI generates storyboard frames through Story to Video and provides more control over scripts, characters, poses, and visual style. The 5 features below support the storyboarding process:
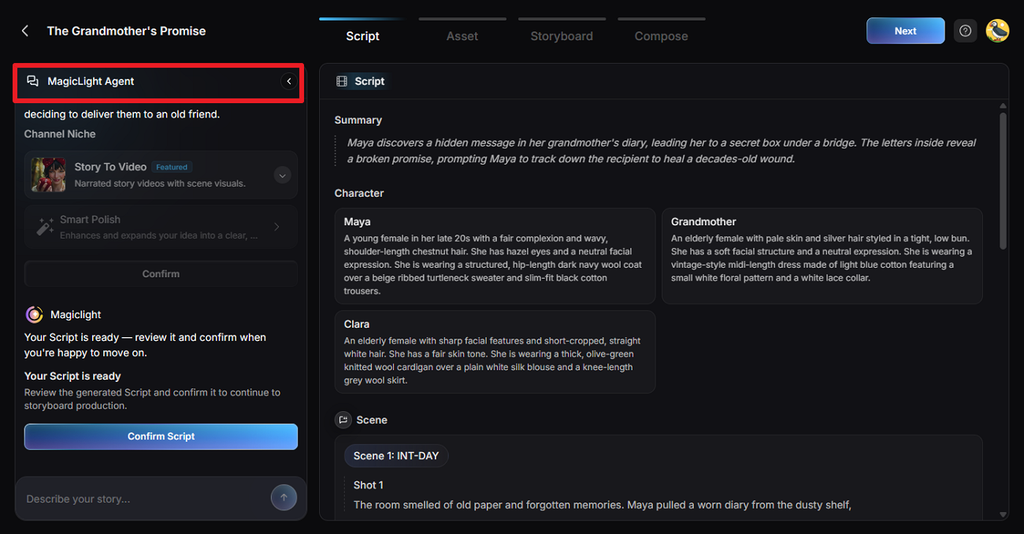
- Agent-Based Story Planning: MagicLight Agent turns a short conversation into a script and selects the appropriate niche before Story to Video organizes it into scenes.
- Long Script Support: Add scripts up to 12,000 characters at once, with 14 AI story models to develop them into scenes.
- Nano Storyboard Controls: Each frame includes controls for clothes, expressions, and 50+ poses, while individual frames can be regenerated without changing the remaining storyboard.
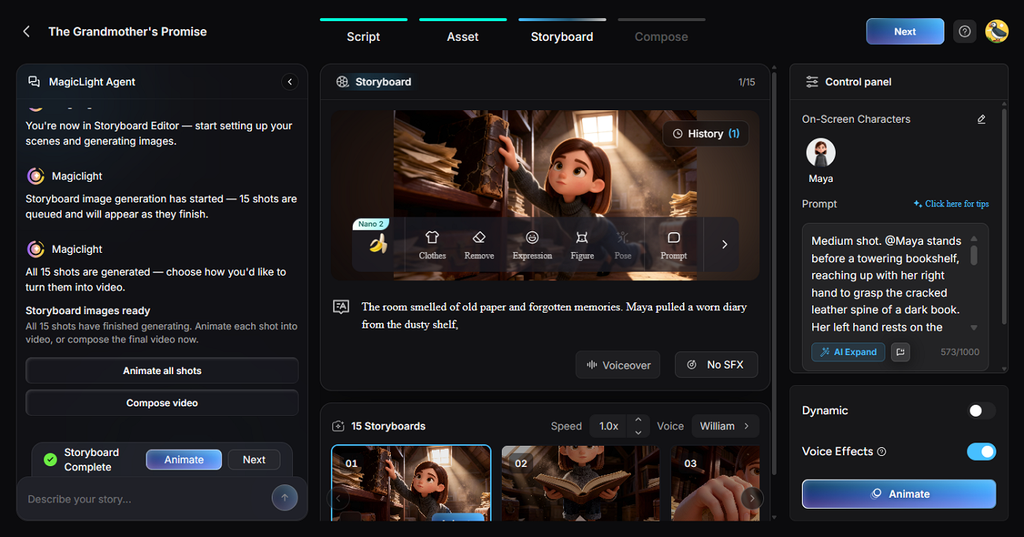
- Consistent Character Design: Characters can be created from a photo or a written prompt of up to 1,000 characters, helping preserve their appearance across storyboard panels.
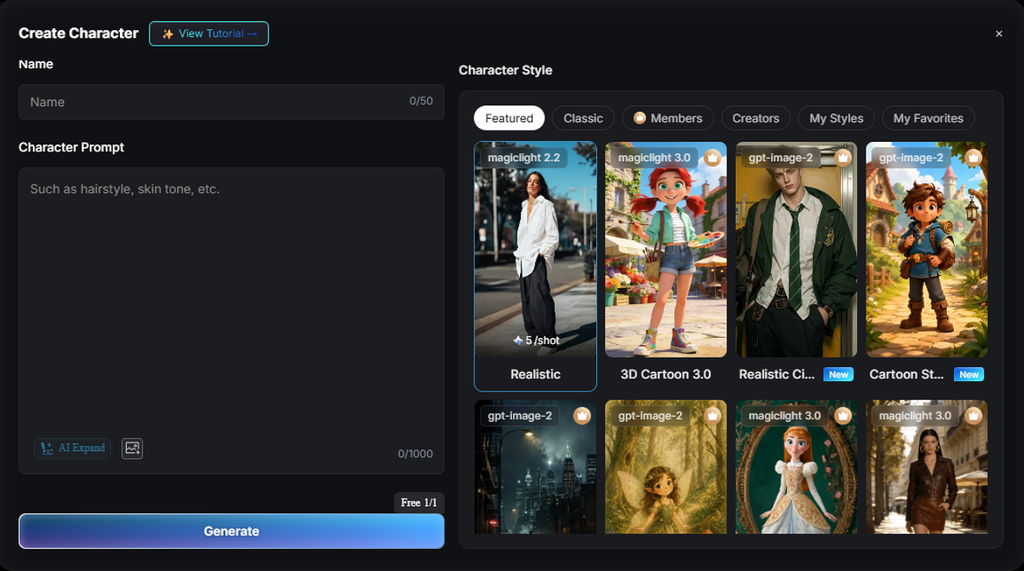
- Flexible Visual Styles: MagicLight AI includes 52 visual styles across 4 families, including Midjourney and MagicLight 3.0, covering realistic, 3D, anime, and other looks.
Guide: How to Create a Storyboard With MagicLight AI
If you are wondering, “how do I create a storyboard,” MagicLight AI handles the process within a Story to Video project. Here are the steps that show how a story idea develops into an organized visual storyboard ready for review and refinement:
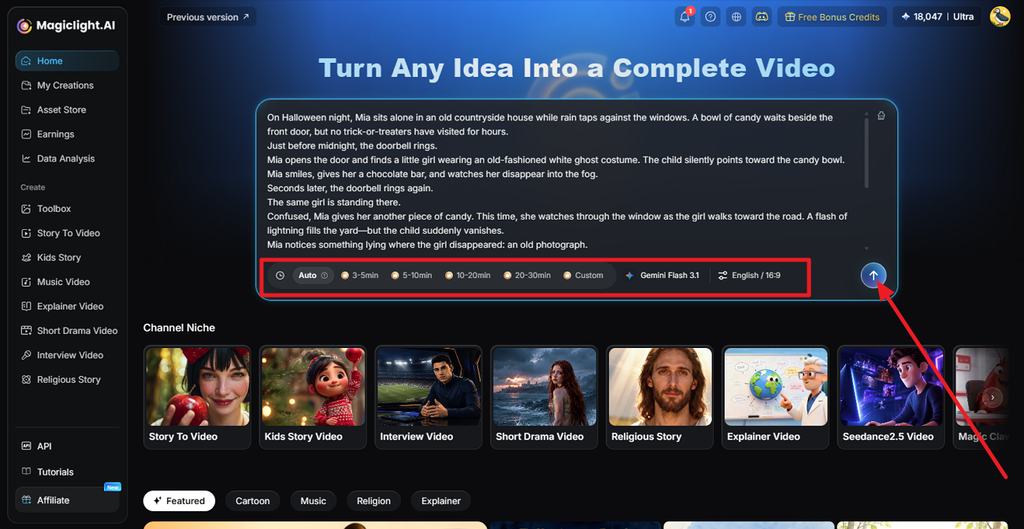
Step 1. Enter Your Story Idea
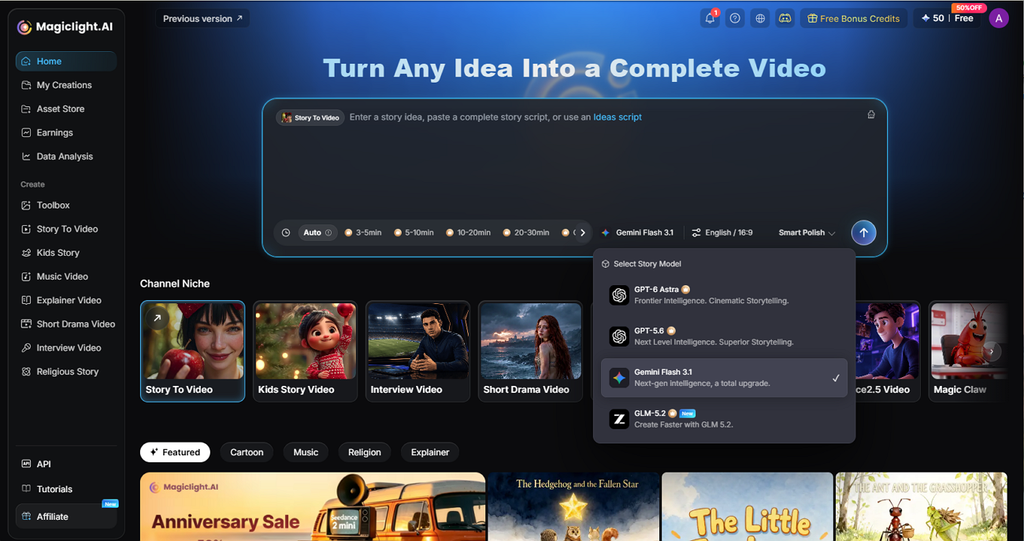
Open MagicLight AI’s homepage and enter a topic, prompt, or complete script into the main input box. Set the preferred video duration and language. Submit the idea so MagicLight Agent can organize it into a structured script for the storyboard.
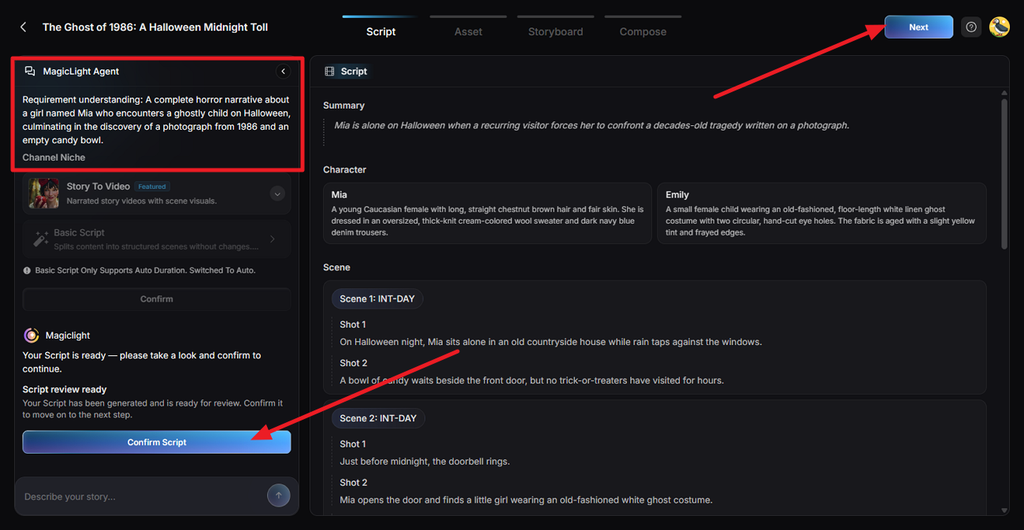
Step 2. Review the Generated Script
Check the summary, characters, scenes, and individual shots prepared from your input. MagicLight Agent also shows how it interpreted the project. Edit any missing or incorrect details, then select Confirm Script.
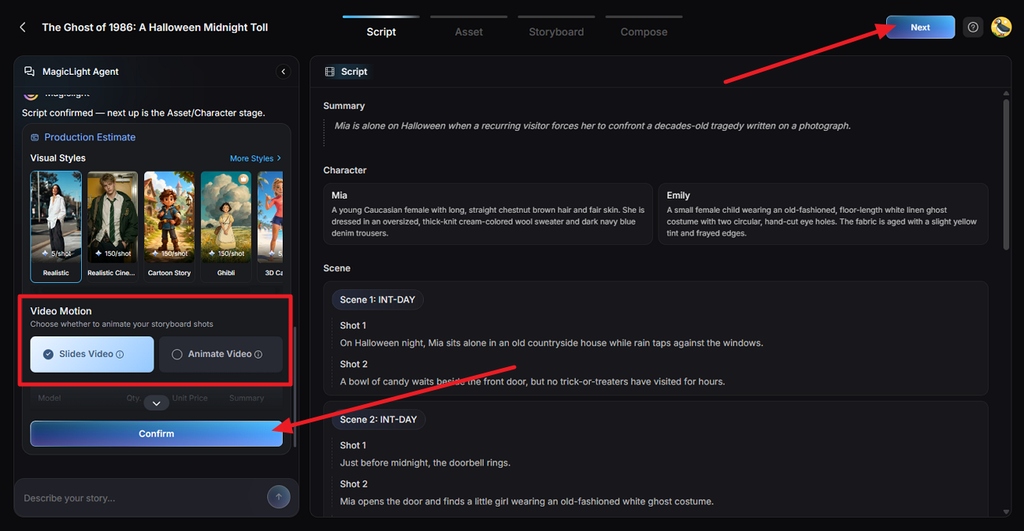
Step 3. Choose the Visual Style
Select a visual style that matches the storyboard, whether realistic, illustrated, cinematic, or animated. Next, choose Slides Video or Animate Video. Review the estimated production cost and confirm the settings before moving forward.
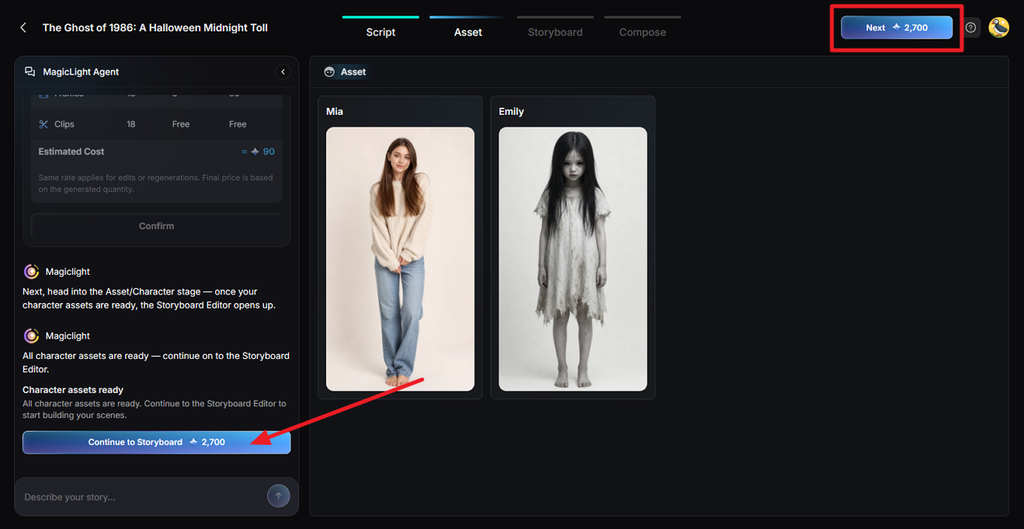
Step 4. Check the Generated Characters
Review the character assets created from the approved script before storyboarding begins. Check clothing, appearance, and overall style, especially for characters appearing in several scenes. Select Continue to Storyboard once everything looks consistent.
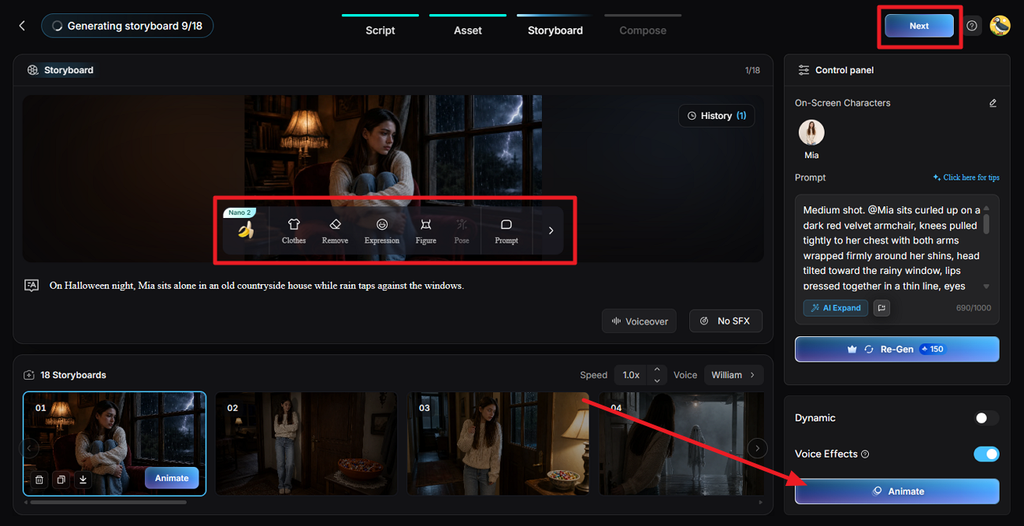
Step 5. Refine the Storyboard
Go through each storyboard shot and adjust details using Clothes, Expression, Figure, Pose, Remove, or Prompt. You can also change voice settings or regenerate individual scenes without restarting the project. Select Animate when the storyboard shots are ready.
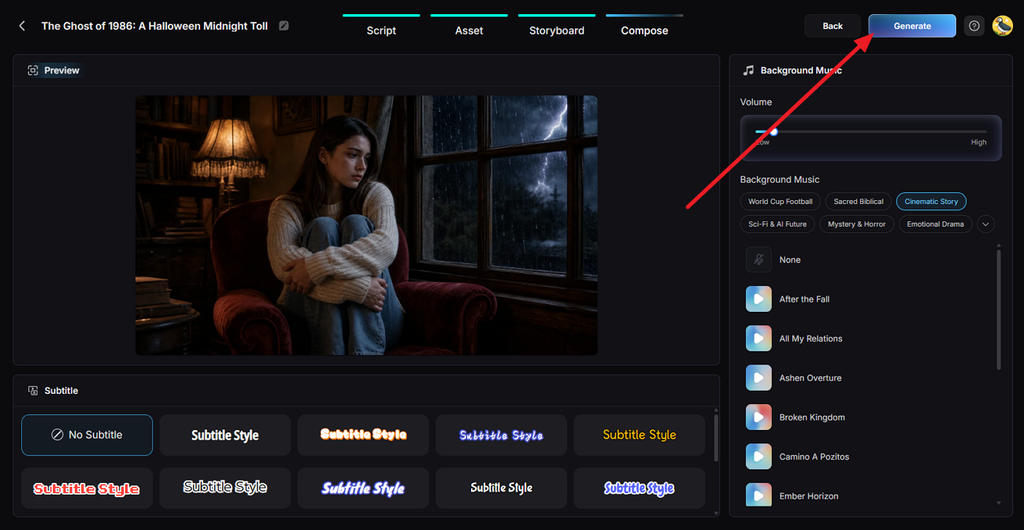
Step 6. Add Music and Subtitles
In Compose tab see how the storyboard scenes work together as a complete sequence. Choose background music, adjust its volume, and select a suitable subtitle style. Click Generate after checking the overall presentation.
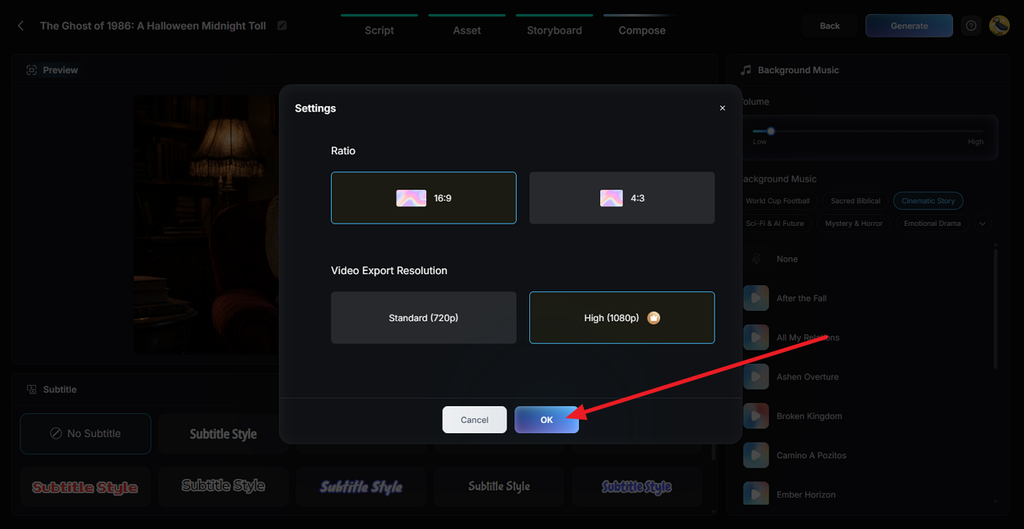
Step 7. Choose the Export Settings
Set the final aspect ratio and video resolution based on the intended platform. Choose vertical formatting for Shorts or Reels, or widescreen for YouTube and presentations. Select the available export quality, then press OK.
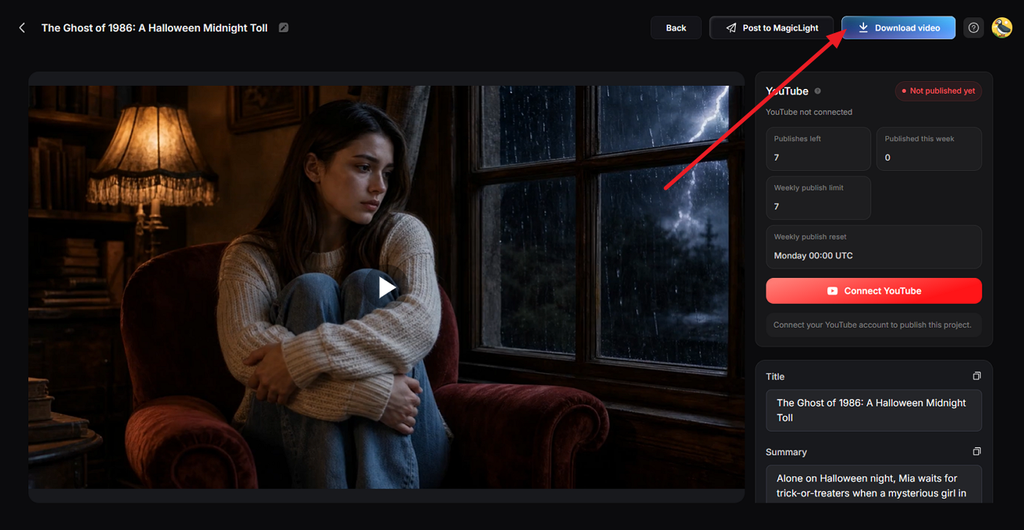
Step 8. Preview and Download the Video
Watch the finished result and check how the approved storyboard translates into video. Review the narration, visuals, subtitles, music, and scene transitions. Fix any scene that needs changes, then click Download Video to save the completed project.
Part 2. Why Creators Use MagicLight AI to Make Storyboards
Paper storyboards work well for smaller projects, but longer productions often require faster revisions and consistent characters. For creators learning how to make storyboards for animation, YouTube videos, or client pitches, the points below explain where MagicLight AI can simplify the storyboarding process:
- Turn Scripts Into Visual Scenes: Script to Video divides a completed script into ordered visual scenes, while MagicLight Agent can develop a short idea into a structured sequence.
- Create Frames Without Drawing: Storyboard frames appear in the selected visual style, helping beginners visualize scenes without manually sketching every panel.
- Continue From Storyboard to Video: An approved storyboard can move into animation with 37 voices, 40 music tracks, and 16 subtitle styles available.
- Manage Longer Story Projects: On paid plans, the Long Video Generator supports projects up to 50 minutes while maintaining recurring characters across scenes.
- Work From Mobile Devices: Alongside its browser version, MagicLight AI offers iPhone and Android apps for accessing projects away from a desktop setup.
- Start Before Upgrading: A free account requires no payment card for an initial project, while paid plans support watermark-free 1080p video exports.
Conclusion
The process of making a storyboard becomes easier when a story is divided into clear shots and visual frames. Paper sketches and free templates work well for simple projects and classroom tasks. For longer projects with recurring characters and frequent revisions, MagicLight AI connects the initial idea, storyboard, and animation within one workflow.
FAQs About How to Make a Storyboard
1. What is a storyboard and why is it important?
A storyboard is a series of panels that shows every planned shot of a video in order. Disney storyman Webb Smith is credited with the idea in the early 1930s. It matters because pacing and framing problems surface early, when fixes cost far less.
2. How do I create a storyboard from a script?
Mark each scene in the script, split it into shots, and sketch one panel per shot with its dialogue underneath. MagicLight AI offers a shortcut for “how to create storyboard” searches, creating the illustrated frames straight from a pasted script.
3. What should be included in a storyboard?
Each storyboard panel should show the shot framing, characters, setting, and main action. Add the shot number, dialogue, sound cues, camera movements, and estimated duration beneath each frame. Scene headings and transition notes also help keep the sequence organized and easy to follow.
4. Can I create a storyboard with AI?
AI tools now generate storyboard frames directly from written text. People exploring “how to create a story board” with AI can try MagicLight AI, which turns an idea or script into illustrated scenes. Each frame stays editable, from poses to expressions, before anything is animated.
5. What is the best AI tool for creating storyboards?
MagicLight AI fits storyboarding especially well, covering the path from a one-line idea or full script to scenes, a consistent cast, and editable frames. The finished board then becomes an animated video, voiced and subtitled without leaving the MagicLight project.