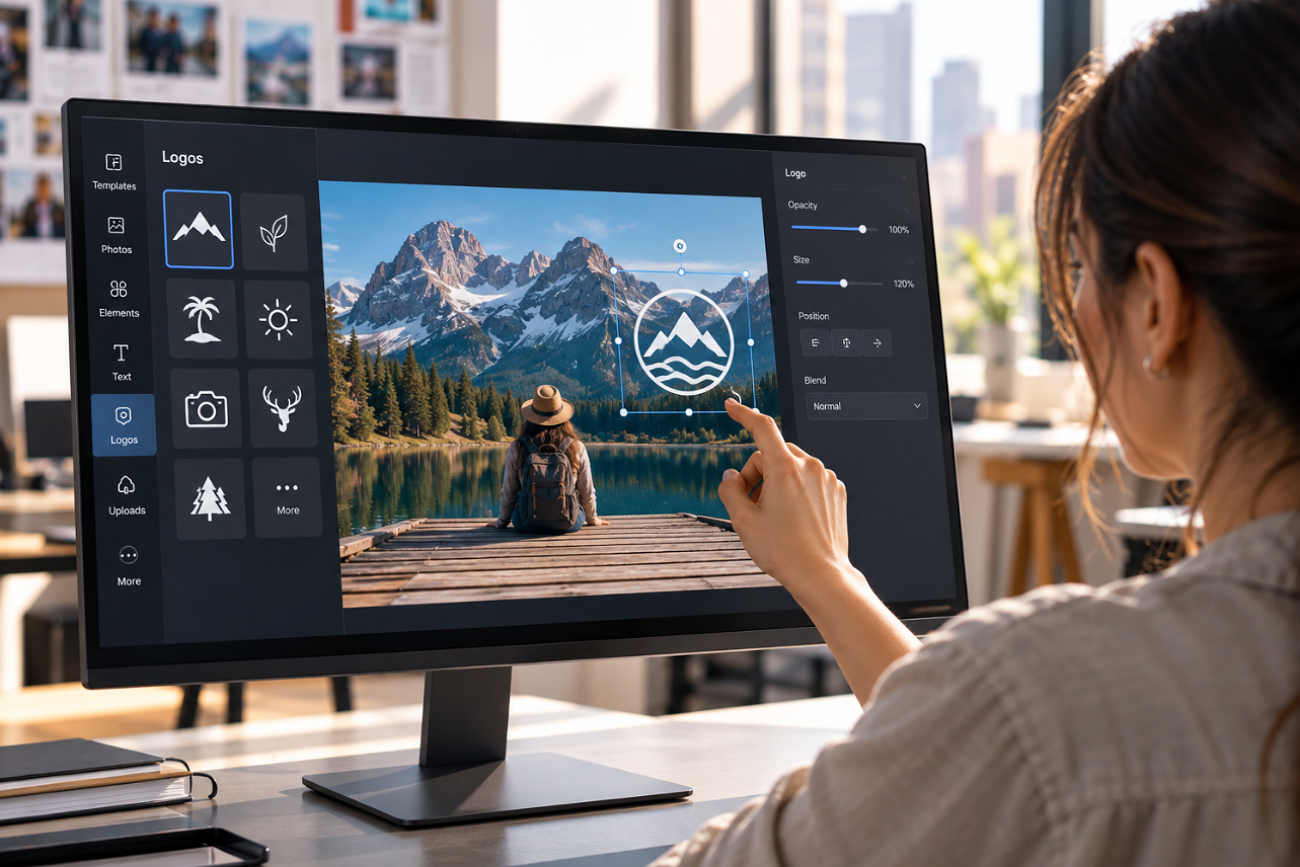
A small logo in the corner of a product shot, event photo, or social post keeps the brand visible wherever the image appears. Anyone searching “how to add logo to photo” needs 2 things, a clean logo file and a suitable place for it.
Photo editors can handle basic logo overlays in a few clicks. MagicLight AI offers another approach by placing logos naturally within a scene, such as on a mug, package, or storefront sign.
Part 1. How to Add a Logo to a Photo
A logo can sit over an image as a simple overlay or appear naturally on a surface within the scene. Both methods require the right files and placement choices before editing begins. The points below cover the essential preparation for anyone learning how to add a logo to a picture:
Prepare Your Logo and Photo
Good source files make logo placement cleaner and reduce extra corrections later. If you want to understand how to add a logo to an image, review the preparation points below:
- Choose a Transparent Logo File: Use a PNG with a transparent background so the logo appears without an unwanted white box.
- Save a Scalable Logo Version: Keep an SVG master for resizing without quality loss, then export PNG copies whenever needed.
- Keep Light and Dark Logo Options: Use a white logo on darker images and a dark version on brighter backgrounds for better visibility.
- Choose Photos With Clear Space: Look for open areas such as walls, skies, or tables where the logo will not cover the main subject.
- Work With the Original Photo: Start with the full-resolution image instead of a compressed social copy to keep the photo and logo sharp.
Key Features of MagicLight AI
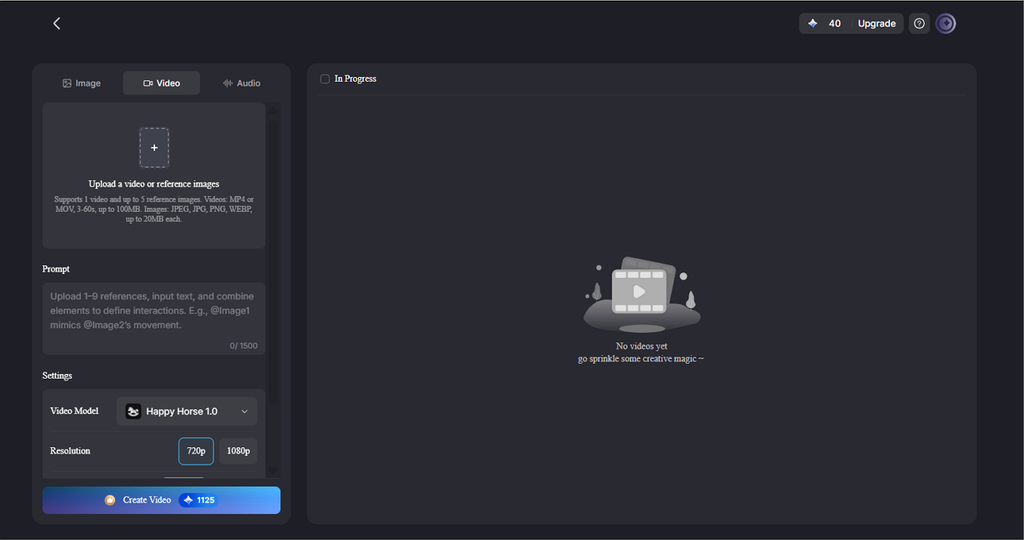
MagicLight AI approaches adding a logo to a photo through written instructions in the Toolbox Image tab instead of traditional layers. Its image tools support different models, reference images, and flexible output settings for branded visuals. The features below provide more control over logo placement, blending, model selection, and reuse:
- Upload Multiple Reference Images: Add the original photo and logo together, with support for up to 10 reference images in one run.
- Control Placement With a Prompt: Describe the logo’s position, size, and surface within a prompt of up to 500 characters, such as “small in the lower-right corner” or “printed on the tote bag.”

- Blend Logos Into the Scene: The selected model can account for lighting, perspective, and surface texture, helping logos appear integrated with materials such as fabric or glass.
- Compare 5 Image Models: Lettering and fine lines can vary between the 5 available models, so users can compare options such as Nano Banana 2 and a GPT Image model.

- Turn Branded Photos Into Clips: Image to Video can animate selected elements of the finished photo, such as moving clouds, while keeping the branded area unchanged with a 1500-character prompt.
Guide: How to Add Your Logo to a Photo With MagicLight AI
In MagicLight AI, understanding “how to add your logo to a photo” becomes a 3-step task inside the Image tab. The prompt decides whether the logo appears as a corner mark or as part of the scene itself:
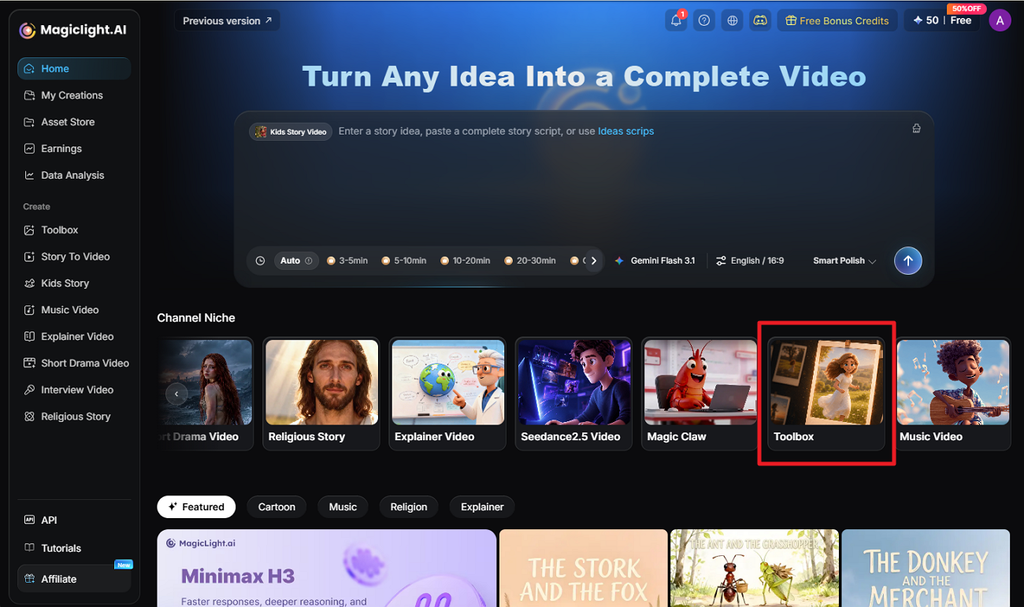
Step 1. Access the MagicLight AI Toolbox
Go to the MagicLight AI home page and open Toolbox. Select the Image tab to access the prompt box, image uploader, model options, aspect ratios, and output settings.
Step 2. Upload the Photo and Logo
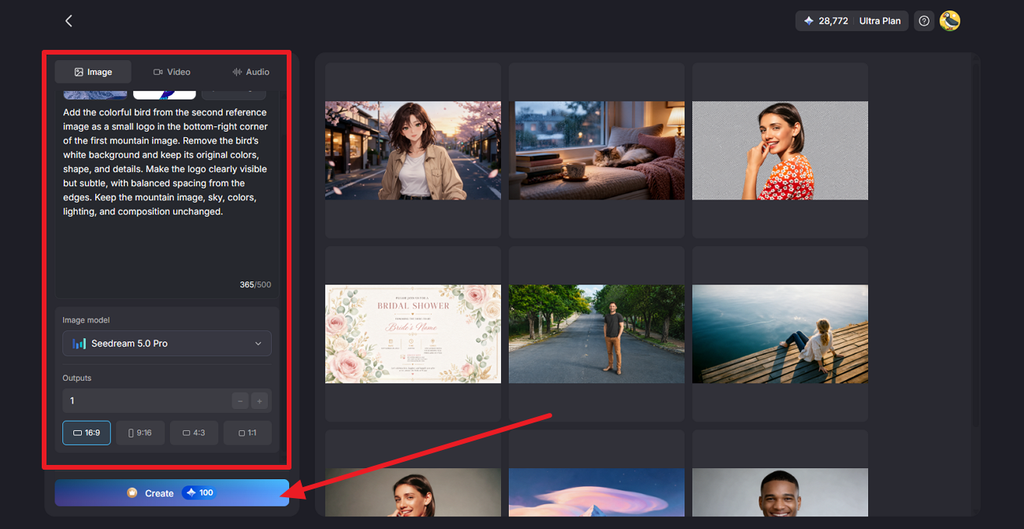
Click Upload images and add both the original photo and logo. In the prompt box, describe the logo’s position, size, and desired appearance. Select an Image Model, choose the original Aspect Ratio, set Outputs, and click Create.
Step 3. Compare and Download the Result
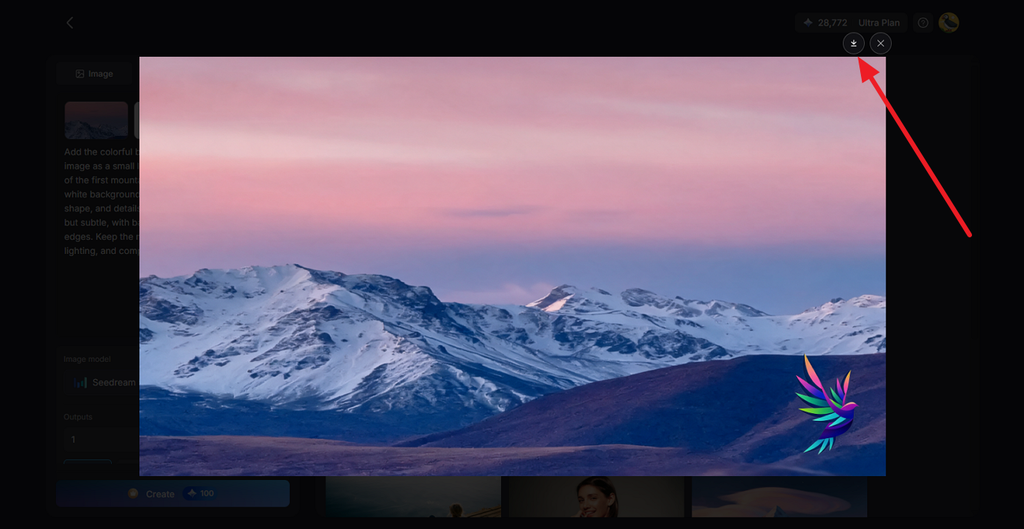
Open the generated versions and compare their logo placement with the original photo. Check the logo’s wording, size, position, and clarity. Also inspect the rest of the image for unwanted changes. Once you find the best version, select the Download icon to save it.
Part 2. Tips for Adding a Logo to Photos
A well-placed logo should remain noticeable without taking attention away from the main subject. Size, position, contrast, and spacing all affect how naturally it fits the image. For anyone learning how to put a logo in a picture, the tips below help keep branded photos clear, consistent, and easy to reuse:
- Keep the Logo Proportional: Start with a modest size and adjust it according to the photo, platform, and intended viewing size.
- Use Consistent Logo Placement: Keep the logo in the same general position across related photos to create a more consistent visual identity.
- Leave Space Around the Edges: Maintain enough distance from image borders to prevent platform crops or profile layouts from cutting off the logo.
- Match Opacity to the Purpose: Lower opacity can make a corner logo less distracting, while product labels and signage usually need stronger visibility.
- Maintain Clear Logo Contrast: Use a light or dark logo version when needed, and consider a subtle shadow on difficult backgrounds.
- Save the Original Without a Logo: Keep an untouched copy so you can change the logo’s size, position, or design later.
- Use Authorized Logo Files: Add only logos you own or have permission to use, especially when creating branded or commercial content.
Conclusion
A clean logo file and thoughtful placement make branded photos look more natural and professional. Anyone learning how to add a logo to a photo can use free editors for simple corner overlays. For placing logos directly on products, clothing, or signs, MagicLight AI provides prompt-based control and multiple results for easy comparison.
FAQs About Adding Logos to Photos
1. How do I put a logo on a picture?
Load the picture into an editor that supports layers or uploads, such as Canva, and add the logo PNG on top. Resize it, move it to a corner, and lower its transparency if it should stay subtle, then download the finished image.
2. Can I add a logo to a photo for free?
Canva’s free plan lets you upload a logo and place it on a photo, while its free Brand Kit has more limited branding features than paid plans. GIMP handles “how to add your logo to a picture” on desktop for free, and MagicLight AI includes free sign-up credits.
3. How do I make a logo look natural on a photo?
Match the logo to the surface it sits on. Follow the object’s perspective and curves, match the scene’s lighting, and use slight transparency or a Multiply blend so texture shows through. A prompt like “printed on the mug” does the same work in MagicLight AI.
4. What is the best AI tool for adding a logo to an image?
MagicLight AI is the tool to try first when a logo needs to sit inside the scene, on a product, sign, or shirt. You upload the logo as a reference, a prompt sets the placement, and five image models offer several versions to compare.
![How to Create a TikTok Video for Beginners [2026 Guide]](https://magiclight.ai/wp-2/wp-content/uploads/tiktok-video-creation-guide-300x169.png)
![How to Blur Faces in Photos Like a Pro [2026 Guide]](https://magiclight.ai/wp-2/wp-content/uploads/blur-faces-in-photos-with-ai-300x198.png)